Point with label & auxiliary label in ArcMap
This is a walk-through on how to create an auto label like below in ArcMap. I’m using maplex on ArcGIS 10.3.
A layer package corresponding to this can be downloaded here.
I’m working with some fake levee breach data here with the goal to fit the breach number label onto a specific part of the custom symbol and a supplementary label with details on the breach as a secondary label, offset from the symbol.
Here’s a peek at the table controlling this labeling.
The symbol I’m using is a custom breach symbol set to 40pt, large enough for the label area to accommodate an 8pt number label. The symbol is included in the layer package at the download link above.
The first step is to set up the number label that overlaps the symbol. The number label for the point ID will be set up in one label class, and the offset label will be set up in a separate label class. Change the Method drop down to ‘Define Classes of features and label each class differently..’ Then add a class, rename one ‘Symbol Number Label’ , and the other ‘Detail Label’. The ‘Symbol Number Label’ class labels the “BNum” field, which contains the point ID.
The example is already set up, but I’ll walk through setting up the labeling. On the Labels tab, set the label field to Label and set the text color to white, and size to 8.
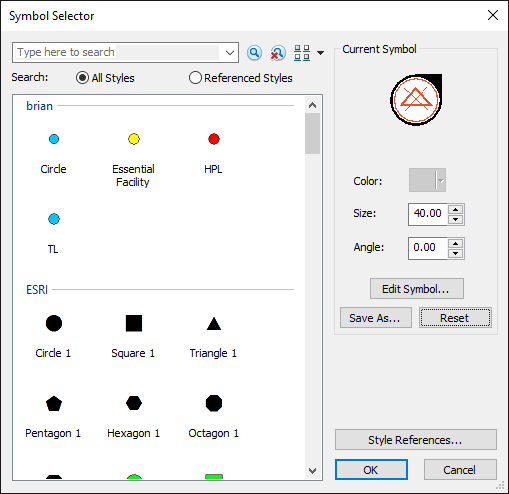
Hit the Symbol button, then hit Edit Symbol. In the General tab, set the offset to x=16 and y=16. It’s faint in the preview but you can see the small white label offset up and right from the black point in the image below.
In the Label tab, hit Placement properties and in the Label Position tab, choose the centered on point position. In the Conflict resolution tab, check Never remove and hit okay.
The labels now look like this.
In the Labels tab, change the class to the ‘Detail Label’ class, set the Text Symbol to Arial, 10pt, bold, black. Next, hit the Expression.. button.
The following expression is used for this part of the label.
"<clr black='40'><acp><fnt size='8'>river</fnt></acp></clr>"&vbnewline&[River]&vbnewline&"<clr black='40'><acp><fnt size='8'>breach width</fnt></acp></clr>"&vbnewline&[Width]
To pick this apart, the first portion:
"<clr black='40'><acp><fnt size='8'>river</fnt></acp></clr>"&vbnewline&[River]
Prints “river” in grey and all caps, then a new line and the [River] attribute.
The second part:
&vbnewline&"<clr black='40'><acp><fnt size='8'>breach width</fnt></acp></clr>"&vbnewline&[Width]
First, starts another new line and prints “breach width” in greay and all caps, then prints the [Width] attribute on another new line.
Hit OK to escape back to the Layer Properties and hit apply. Next, hit the Placement Properties.. button. In the Label Position tab, hit the Position.. button and choose East.
Hit the Label Offset.. button and set the offset to 5 points.
In the Placement Properties Conflict Resolution tab, check Never remove.
Hit OK and OK again in the Layer Properties to escape back to the map. The label-on-symbol and auxiliary labels are complete and remain dynamic.
The example can be downloaded as a ArcMap layer package here.


